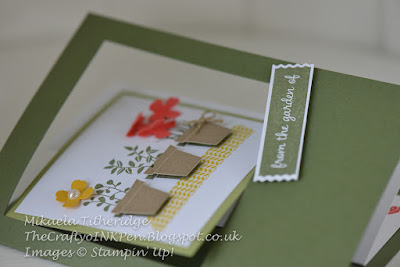
I couldn't resist but share the Pop up Swing Card with my ladies, combined with this popular stamp set. I can honestly say, that it was a hit. It's such an enjoyable movement card to make.
I had set out to make this card using a colour that I never use … Always Artichoke. Why I never use it is beyond me, as it was perfectly fitting for this set. I thought the strip of Washi Tape looked like a table cloth that the pots sat upon.
I had seen many cards like this one on Pinterest and wanted to make one myself. The Berry Basket Die has been cut down here to create a narrow pocket to house either a packet of seeds or a Garden Centre Gift Voucher.
We couldn't not assemble the Berry Basket in it's entirety though and embellish it simply.
I so enjoyed designing this set and sharing it with my ladies this past week. I'm actually sad that I don't have another class to be able to share it some more.
The classes wouldn't have been complete without a little table gift and I couldn't resist these cute Pear shaped note pads that I stumbled across. They were just so perfect and fitted beautifully in the Berry Basket once complete.
If you like the look of this class and you fancy joining in a future class of mine, then be sure to check out my Classes and Events Tab to see what I have on offer. I shall be adding more classes over the coming two weeks … many with a Christmas theme as we start the slow build up of the Festive Season. It would be great to have you join me.
I hope you like this set as much as I do.
Mikaela x


The projects are beautiful! Love this set!!
ReplyDeleteBut the little pears are just adorable!!! So darn cute!
Thank you for stopping by and leaving me a message. Your kind words are much appreciated and I'm pleased that you like the projects that I've shared. The Pears really are so adorable, which was why I couldn't resist but obtain one each for my ladies and embellish them simply with a tag. I purchased them through eBay, but with some patience, you could make one of these easily enough. Cut your chosen shape in half, stack them before using Hot Glue down the spine. Once set, you fan it round and secure in place with a paperclip … so effective x
ReplyDeleteThank you Mikaela, you are so sweet!
ReplyDeleteLove browsing through your blog, lots of eye candy! Thank you for all the inspiration and tip on making my own pear! ;-)
Oh I'm so pleased that you like to browse my blog and it offers you some eye candy. It makes it all worth while when you know that people are enjoying what you're sharing. I've just realised that I don't have a Pinterest link to my boards, which if you've not discovered, you may also like: https://www.pinterest.com/craftyoinkpen/ Enjoy xx
ReplyDeleteThis is just adorable! I just found your blog . . . thanks for sharing all your lovely creations!
ReplyDeleteaww thank you Brenda, that is so kind of you to say. I too am pleased that you've found my blog and have taken the time to message me. I'm pleased you like the creations that I share. Do stick around to see some more. Kind Regards x
ReplyDelete